Interface Elements for Desktop > Report Designer > Report Designer for WPF > Creating Reports > Adding Details about a Report > Create or Modify Watermarks of a Report
This document describes how to add a text watermark in a report, or turn a picture into a report's background. Note that watermarks are visible only in the Preview mode.
To create a new watermark in a report (or to modify the existing one), do the following.
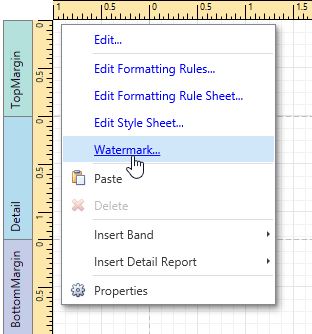
1.Right-click the report, and in the invoked context menu, click the Watermark... link.
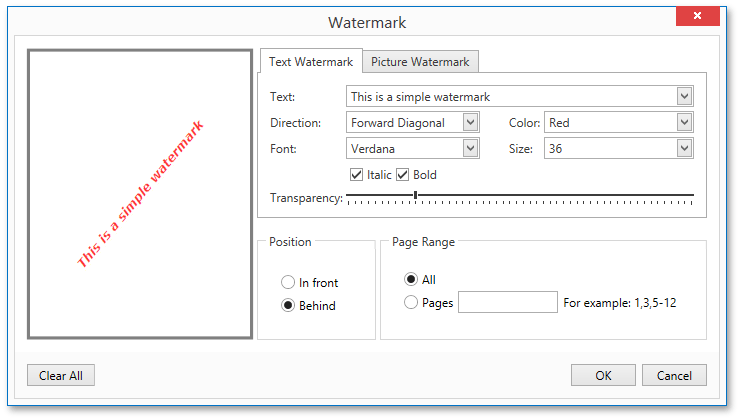
2.In the Text Watermark tab of the invoked Watermark dialog, enter the watermark's text and specify the required properties such as the Direction, Transparency, Color, etc.
3.Then, switch to the Picture Watermark tab to load the image to be used as a watermark. To do this, click the ellipsis button for the Image property. In the invoked dialog, select the file containing the image that you wish to load and click Open.

4.Next, define the picture's properties, such as the Size mode, Alignment , Transparency, etc.
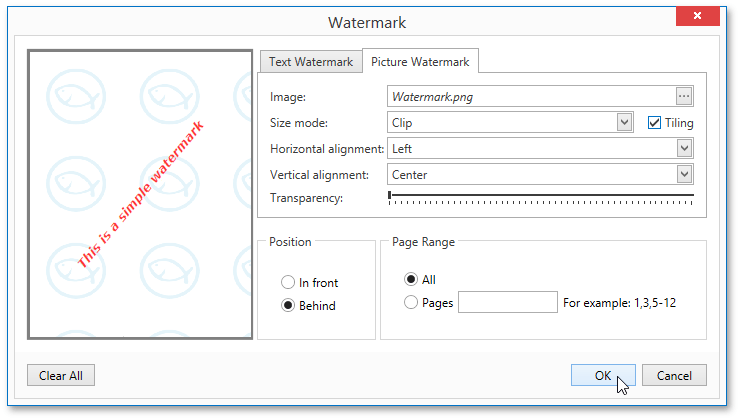
5.In addition, you can select a watermark position behind or in front of the document, and specify the page range in which the watermark will be printed.
As you can see, it is possible to use both textual and image watermarks simultaneously.
The report with watermark is now ready. Switch to the Print Preview tab and view the result.


 See Also
Add Page Numbers and System Information to a Report
Copyright (c) 1998-2016 Developer Express Inc. All rights reserved.
Send Feedback on this topic to DevExpress.