Interface Elements for Desktop > Report Designer > Report Designer for WPF > Report Types > Label Report
This tutorial describes the steps required to create a label report containing employee badges.
To accomplish this task, do the following.
1.Click the New button on the Toolbar or the plus button next to the report tab headers to create a new report.
2.The invoked Report Wizard will guide you through the process of creating a label report. For detailed instructions on wizard steps, refer to Label Report.
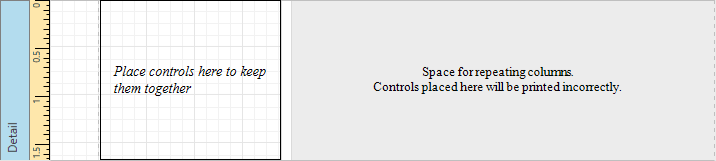
3.After performing the above steps you will see that the report's Detail band is divided into three different areas. The first area at the left-hand side indicates the actual available band area for controls to be placed within it. The gray area at the right-hand side is intended for the columns in which labels will be displayed, so it cannot be occupied by controls. Finally, the white area specifies an indent between the available and reserved areas.
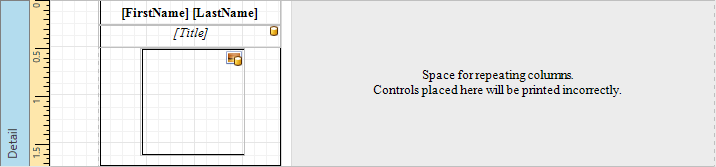
4.Bind a report to a data source containing information about employees.
5.Then, drop the required fields from the Field List onto the available Detail band's area, and adjust the layout.
The label report is now ready. Switch your report to the Print Preview tab and view the result.


 See Also
Copyright (c) 1998-2016 Developer Express Inc. All rights reserved.
Send Feedback on this topic to DevExpress.