|
<< Click to Display Table of Contents >> Adding/Editing Worksheets |
  
|
|
<< Click to Display Table of Contents >> Adding/Editing Worksheets |
|
Overview
The Worksheet is the means by which data is entered against a specific Review Template. This document explains how to add new worksheets, edit and delete existing ones. To configure which Worksheet Fields appear read Managing ReviewTemplate Assignment. To search for an existing worksheet read Searching for Worksheets.
Add Worksheet
To create a new worksheet:
1.Select the Worksheet node from the Folder Items list for the appropriate Review Template.
2.The Worksheet Header Dialog will appear.
3.Fill in the appropriate values in the dialog, and then click ‘Add’. You will then be presented with a blank worksheet preset to values defined in the Topic Editor.
Pull List: If Pull List worksheet records have been created from Managing Pull List Worksheets, then the top section of the dialog will display the pull list and its profiles. First select the pull list and the profile for which you wish to review a worksheet. When you choose from one of the following options worksheet header fields will be populated from the pull list record.
▪Next: This pulls the next record to be reviewed.
▪Pick: Will allow you to choose a record that you wish to review.
Only those pull list worksheet records show up which have not yet been reviewed. To view a complete list, refer to Managing Pull List Worksheets.
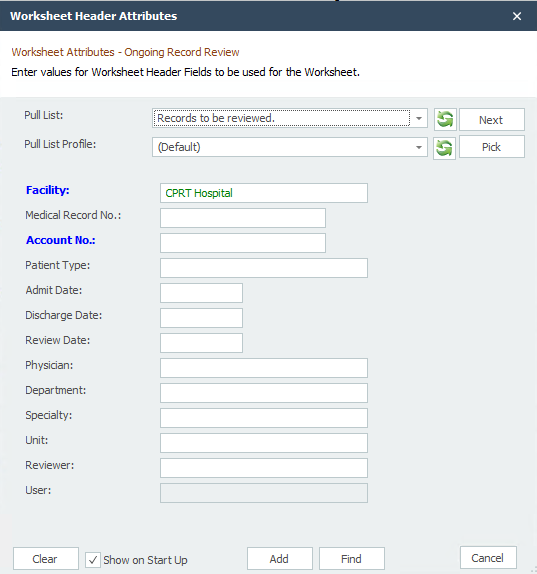
No other value can be entered before filling in the value for Facility. The Facility field also controls what Topics And Criterion appear in the Worksheet as defined by Assigning Topic Rights.
If the Primary Fields match with an already existing worksheet, the 'Add' button at the bottom changes to 'Edit' button. To enter more episodes of criterion for the same worksheet use the Repeat Criterion feature.
If the same primary fields are used in another Review Template a link ![]() will appear indicated that these primary keys are used in another Review Template. Thus the two worksheet header records will be linked and any changes made to the worksheet header fields which are not Review Specific will affect the other Review Templates. The ADT symbol
will appear indicated that these primary keys are used in another Review Template. Thus the two worksheet header records will be linked and any changes made to the worksheet header fields which are not Review Specific will affect the other Review Templates. The ADT symbol ![]() will show up indicating this worksheet header information is being populated from the interface feed. If multiple episodes are found matching a primary field a list is displayed from which you can select one or cancel to create a new one.
will show up indicating this worksheet header information is being populated from the interface feed. If multiple episodes are found matching a primary field a list is displayed from which you can select one or cancel to create a new one.
Buttons
Clear: Clicking this button will clear all values in the dialog.
Show on Startup: If this is unchecked, this dialog is displayed before user can interact with the Worksheet Work Area. Uncheck the box if you do not want this dialog to appear first. This will allow you to directly perform a filter search.
Add / Edit: Depending on if the worksheet already exists in this Review Template, this button will toggle between 'Add' and 'Edit'
Find: Clicking this button will perform search based on the field values entered and a list will be displayed in the Worksheet Work Area.
Cancel: Clicking this button cancels any activity and dismisses the dialog.
Apply changes to Criterion Attributes: When a worksheet header field value is changed, you can replicate the changes to the worksheet criterion fields. This option can be configured differently for each workstation. Choosing 'Yes' will apply the changes, 'No' will not replicate the changes. You have the option to check the 'Do not ask this again' box if you choose not to be prompted every time you make a change. This can also be configured from Program Options.
Edit Worksheet
You may edit the properties for a worksheet after it has been saved. Make sure the Worksheet Work Area is active for the appropriate Review Template.
1.Click Edit Worksheet Header from the Application Tab on the Application Main Ribbon.
2.Make any necessary changes to the fields, then click ‘OK’.
Header changes are not saved until you save the Worksheet.
Delete Worksheet
You may delete a single worksheet or select multiple worksheets for deletion.
1.Search for the worksheet or worksheets to delete so they list in the list area section of the worksheet display area.
2.Highlight the worksheet or worksheets to delete.
3.From the Application tab of the Main Application Ribbon, click ‘Delete Worksheets’.
Purge Worksheet
This function is used when a group of worksheets are no longer needed to report on or needed to be kept for historical purposes.
1.Click on the File Tab of the Main Application Ribbon and then click Purge Worksheets.
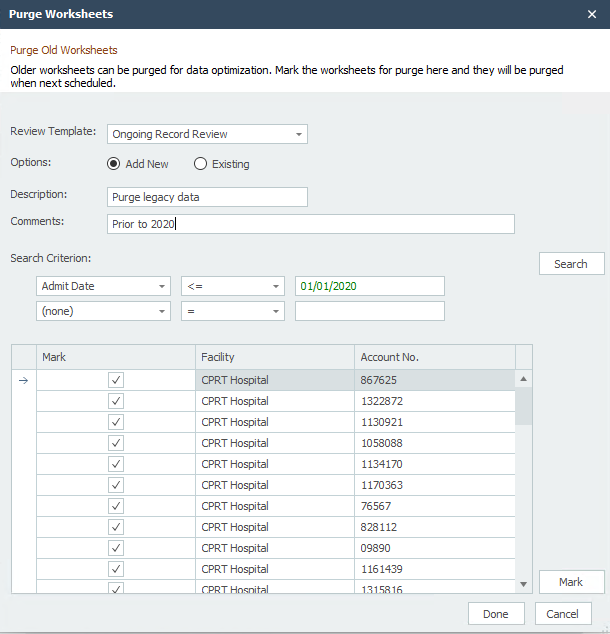
2.In the Purge Worksheets parameters box choose the desired Review Template from which to purge worksheets
3.Choose 'Add New' or 'Existing'
oChoosing 'Add new' will allow you to set the parameters for your purge
▪Add desired description and comment
▪From the Search Criterion section click on the drop down arrow and choose the values to run your search. Click Search when ready.
▪Click on the 'Mark' button
NOTE: Once the worksheets are purged, all the worksheet data will be permanently deleted.
oChoosing Existing will allow you to see the purged worksheet details and history
Header Fields
Certain labels within the Header Attributes dialog take on a special appearance, depending on how they have been defined in the Managing Review Template Assignment dialog box. To learn more about these special fields read Worksheet.
Primary: These are the fields that appear in a bold blue. These represent required data fields and must have a legitimate data value entered before the worksheet can be saved. It helps to differentiate between visits for one patient.
Mandatory: These fields appear in light blue in your Worksheet Header dialog box and defines whether or not you are required to fill in the data value. You will not be able to save a worksheet before entering values for mandatory fields.
Sticky: Values for sticky fields are carried forward from the previous worksheet to the next one.
Shortcuts can be used when doing data entry for date and Attribution Type fields.
Edit Multiple Worksheet Headers
Worksheet header fields for multiple worksheets can be edited by selecting multiple rows. You cannot change primary fields when choosing multiple select. Changes made here are not replicated to the worksheet criterion. Worksheet header fields are changed. Check the fields you want values changed for. Clicking OK applies the changes immediately.
